

State Machines for Character Control
From Data Viz to Game Dev: A Toe Dip into State Machines for Character Control

The concept of statecharts was first introduced by David Harel in his seminal 1987 paper "Statecharts: A Visual Formalism for Complex Systems". He distinguished statecharts as a superset of finite state machines (FSM). Statecharts are part of the UML specification, and are similar to FSMs in that statecharts are deterministic. They offer distinct advantages to finite state machines such as hierarchical states, parallel states, and the ability to invoke child state machines.
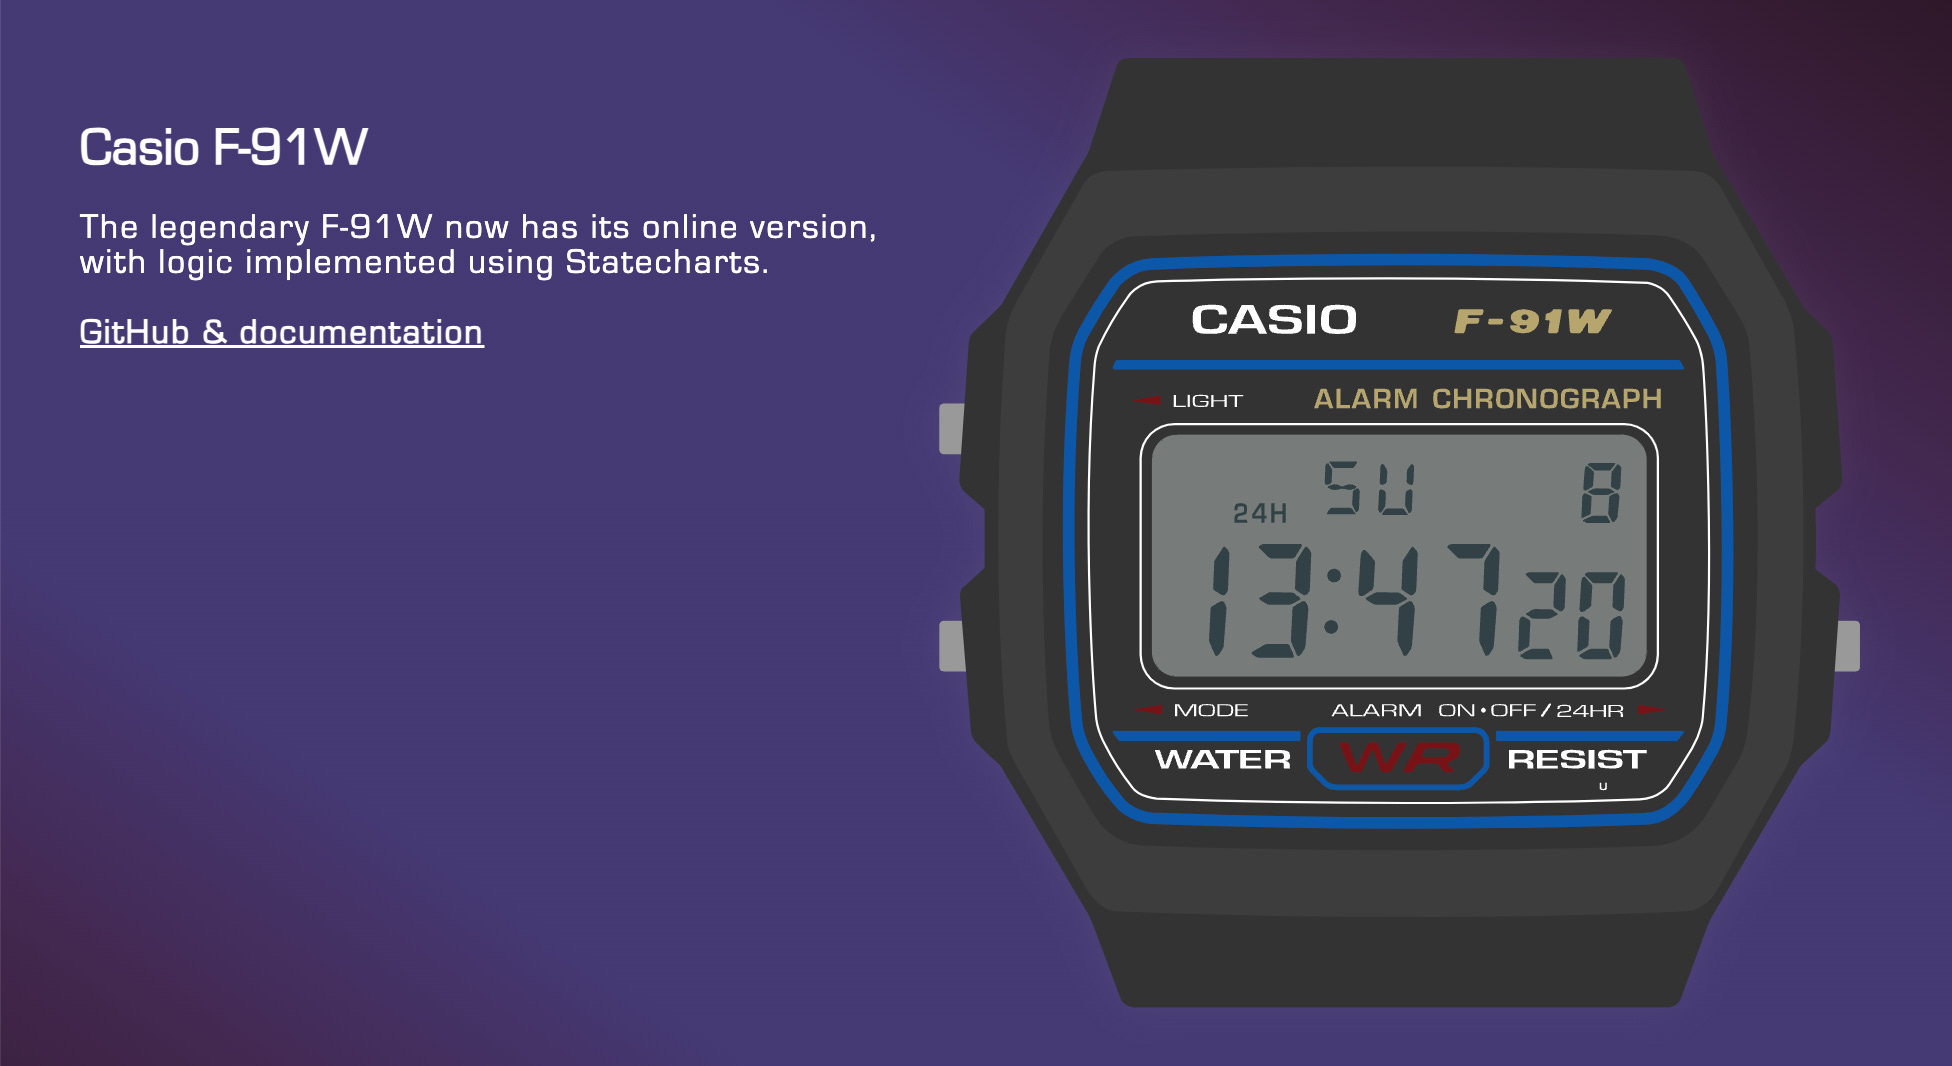
Harel used a Casio digital watch as a minimal example that still demonstrates how statecharts model complex parallel and hierarchical state. Though the Casio may seem like a trite example, it is worth mentioning that Harel was using statecharts to develop systems used in fighter jets. You can explore an interactive implementation of this classic example which brings Harel's original diagrams to life.
As a web developer who's spent years building complex data visualizations I've come to love using state machines and XState in my web application work. Statecharts felt like they could translate naturally to gaming since menu systems, combat states, and dialogue trees all share similarities with web applications. While I'm still exploring the gaming space, I was excited to see how a familiar pattern I've leveraged in web development might offer fresh perspectives on structuring game systems.
Even though I use many of the advanced features of the statechart specification in my role as a web developer, for this game development exploration I'll be implementing a simpler finite state machine since the current needs of the project don't call for anything deeper at this point.
Before diving into my implementation, it's worth acknowledging Robert Nystrom's "Game Programming Patterns" which provides an excellent foundation for understanding state machines in game development. While Nystrom's book expertly introduces the State pattern and variations (hierarchical states and pushdown automata), my implementation addresses some modern development challenges.
Nystrom's examples focus on teaching the core pattern, while my implementation additionally incorporates memory safety through smart pointers, state management, and debugging support. These additions reflect the real-world requirements of developing and maintaining state machines in contemporary game engines (aka Unreal Engine).
The Problem: Character Controller Complexity
When I started developing my game's character controller, I faced a familiar challenge in a new context. The character needed to handle multiple movement abilities:
Basic jumping
Double jumping (when equipped)
Gliding (when equipped)
Charged jumping (when equipped)
Swimming
Energy management for abilities
Each of these abilities interacted with others in complex ways. For example:
You can only double jump if you have the ability equipped AND enough energy
Gliding can only be initiated while falling
Charged jumping requires being grounded and having the ability equipped
Swimming or Landing will interrupt other movement states
Initially, I tried managing this with a series of boolean flags and conditional statements. The code quickly became unwieldy:
void APlayerCharacter::HandleJumpInput()
{
    if (bIsGrounded) {
        Jump();
    } else if (bIsFalling &&
               !bHasDoubleJumped &&
               HasDoubleJumpAbility()) {
        if (Energy >= DoubleJumpEnergyCost) {
            PerformDoubleJump();
            bHasDoubleJumped = true;
        }
    } else if (bIsFalling &&
               !bIsGliding &&
               HasGliderEquipped()) {
        if (Energy >= GlideEnergyCost) {
            StartGliding();
        }
    }
    // ... more conditions
}
This approach had several problems:
State management was scattered throughout the code
State transitions were implicit and hard to track
Adding new abilities required modifying existing code
Bug fixing was difficult because state interactions were unclear
Testing was cumbersome due to the number of possible state combinations
Prototyping with XState
I first encountered statecharts while using XState to model interactive visualizations, and I fell in love with how easily I was able to model user interactions and test transitions between states. Since I am exploring Game Development in Unreal Engine I naturally started looking for statechart libraries using C++. I found the Boost.MSM (Meta State Machine) and Boost.Statechart libraries, but their pages are rife with broken links and outdated documentation.
Instead, I turned to the familiar XState to prototype, even though it is a javascript implementation. While Stately provides visual tools, I prefer working directly with the XState API using a code-first approach. The following markup is essentially JSON and feels natural to write:
import { createMachine } from "xstate";
export const machine = createMachine({
  context: {
    jumpCount: 0,
    hasGlideTool: true,
    hasDoubleJumpTool: true,
    hasChargedJumpTool: true,
  },
  id: "gameControl",
  initial: "grounded",
  states: {
    grounded: {
      on: {
        BEGIN_CHARGING: {
          target: "charging",
          guard: {
            type: "canChargeJump",
          },
        },
        JUMP: {
          target: "falling",
          actions: {
            type: "doJump",
          },
        },
        FALL: {
          target: "falling",
          actions: {
            type: "removeInitialJump",
          },
        },
        SWIM: {
          target: "swimming",
        },
      },
      entry: {
        type: "resetJumpState",
      },
    },
    // ...link below has full implementation and interactive example
  }
});
Becomes…
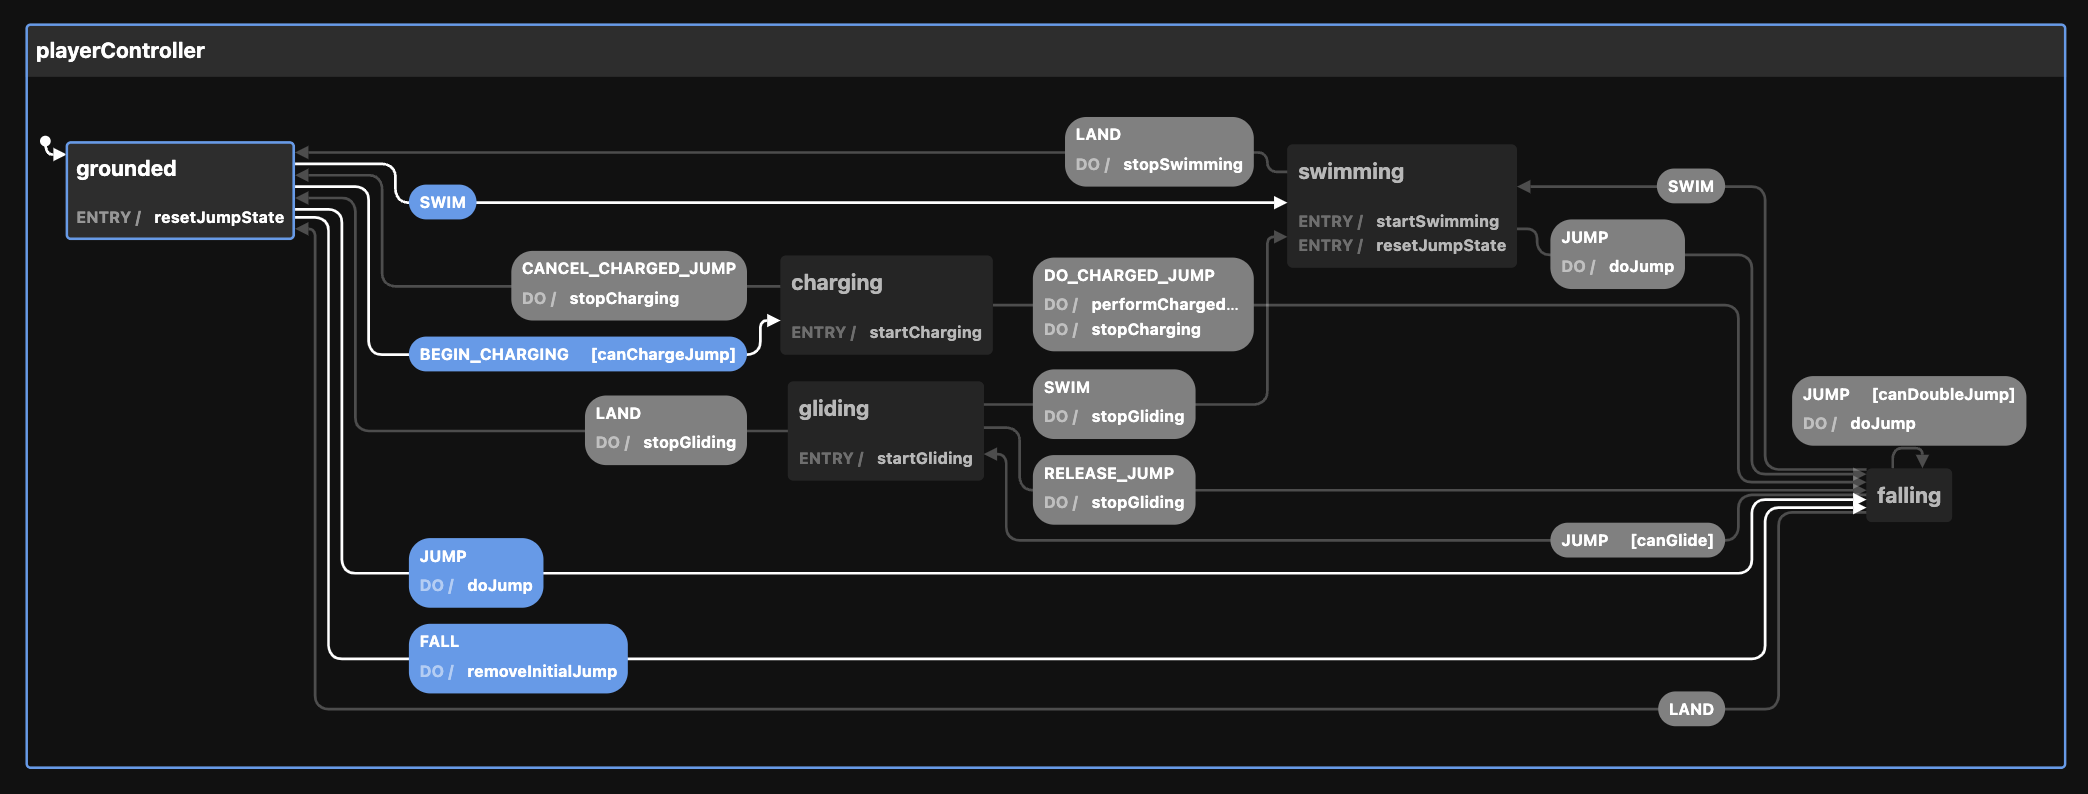
You can view the full model and experiment with the interactive visualization here.
This visualization helped identify several key requirements:
States need entry and exit actions
Some transitions need guard conditions
Some states need to trigger immediate actions (aka side effects)
Which events are relevant to each state
Implementing in Unreal Engine: The State Pattern
While XState was perfect for prototyping, implementing in Unreal Engine required translating these concepts to C++. I wanted to maintain the clarity and maintainability that made the state chart approach so powerful while leveraging C++'s type system and Unreal's performance requirements.
The Core Architecture
The implementation revolves around three main components:
The State Manager - Orchestrates state transitions and maintains a single instance of each state
The Abstract State Base Class - Defines the interface for all states
Concrete State Implementations - Encapsulate state-specific behavior
Let's dive into each component in detail.
The State Manager
The state manager serves as the central orchestrator of the system:
class BLOOMLIGHTCITY_API CharacterStateManager
{
public:
  CharacterStateManager(ABCPlayerCharacter* Character);
  ~CharacterStateManager();

  void Initialize();
  void TransitionToState(CharacterState* NewState);

  CharacterState* GetCurrentState() const { return CurrentState; }
  GroundedState* GetGroundedState() const { return GroundedStateInstance.Get(); }
  FallingState* GetFallingState() const { return FallingStateInstance.Get(); }
  GlidingState* GetGlidingState() const { return GlidingStateInstance.Get(); }
  SwimmingState* GetSwimmingState() const { return SwimmingStateInstance.Get(); }
  ChargingState* GetChargingState() const { return ChargingStateInstance.Get(); }

private:
  ABCPlayerCharacter* OwnerCharacter;
  CharacterState* CurrentState;

  TUniquePtr<GroundedState> GroundedStateInstance;
  TUniquePtr<FallingState> FallingStateInstance;
  TUniquePtr<GlidingState> GlidingStateInstance;
  TUniquePtr<SwimmingState> SwimmingStateInstance;
  TUniquePtr<ChargingState> ChargingStateInstance;

  void CreateStates();
};
Key design decisions in the state manager:
State Ownership: States are owned by
TUniquePtrfor automatic memory managementType Safety: Concrete state getters return specific types rather than base class pointers
Initialization Control: States are created and initialized in a controlled sequence
Single Point of Truth: The manager maintains the only reference to the current state
The state transition logic is particularly important:
void CharacterStateManager::TransitionToState(CharacterState* NewState)
{
  if (!NewState) return;

  if (NewState != CurrentState)
  {
    CurrentState->Exit();
    CurrentState = NewState;
    CurrentState->Enter();

    if (OwnerCharacter) {
      OwnerCharacter->NotifyStateChange(NewFMState);
    }
  }
}
This implementation ensures:
Null state protection
State Exit() event is always run before transitioning
State Enter() event is always run upon entering a state
State change notifications for observers
The State Base Class
The abstract base class defines the interface for all states:
class BLOOMLIGHTCITY_API CharacterState
{
public:
    CharacterState(ABCPlayerCharacter* Character);
    virtual ~CharacterState();

    // Core state methods
    virtual void Enter() {}
    virtual void Exit() {}
    virtual void Update(float DeltaTime) {}

    // Input handlers
    virtual void HandleJumpStart() {}
    virtual void HandleJumpRelease() {}
    virtual void HandleChargeGlideStart() {}
    virtual void HandleChargeGlideRelease() {}
    virtual void HandleFall() {}
    virtual void HandleLand() {}
    virtual void HandleSwim() {}

    // State type checking
    virtual bool IsGroundedState() const { return false; }
    virtual bool IsFallingState() const { return false; }
    virtual bool IsGlidingState() const { return false; }
    virtual bool IsSwimmingState() const { return false; }
    virtual bool IsChargingState() const { return false; }

    CharacterStateManager* StateManager;

protected:
    ABCPlayerCharacter* OwnerCharacter;
    UCharacterMovementComponent* MovementComponent;

    static float OriginalAirControl;
    static float OriginalGravityScale;
    static float OriginalJumpZVelocity;

    void ResetJumpState();
    void DoJump();
};
Design considerations in the base class:
Default Implementations: Empty virtual methods reduce boilerplate in concrete states
Protected Members: Common functionality available to derived states
Type Checking: Virtual methods for state type identification
Resource Management: Shared references to character and movement component
State Restoration: Static members track original movement values
Concrete State Implementation: The Falling State
Let's examine one concrete state implementation in detail:
FallingState::FallingState(ABCPlayerCharacter* Character)
    : CharacterState(Character) {}

void FallingState::Enter()
{
    FM_LOG(UBloomlightCitySettings::CVarStateMachineStatesLogging,
           LogBCCore,
           Log,
           TEXT("Entering FallingState"));
}

void FallingState::HandleJumpStart()
{
    if (OwnerCharacter->CanDoubleJump())
    {
        ConsumeEnergyForDoubleJump();
        DoJump();
    }
}

void FallingState::HandleChargeGlideStart()
{
    if (OwnerCharacter->CanGlide())
    {
        StateManager->TransitionToState(StateManager->GetGlidingState());
    }
}
Key aspects of the falling state:
Guard Conditions -> checking preconditions (CanDoubleJump, CanGlide)
Energy consumption tied to actions
State Transitions to other states
The Gliding State: Handling Continuous Updates
The gliding state demonstrates how to handle continuous state updates:
void GlidingState::Update(float DeltaTime)
{
    UpdateGlidingVelocity(DeltaTime);

    EnergyConsumptionTimer += DeltaTime;
    if (EnergyConsumptionTimer >= EnergyConsumptionInterval)
    {
        EnergyConsumptionTimer = 0.0f;
        if (!ConsumeGlidingEnergy())
        {
            // Transition to falling state if we're out of energy
            StateManager->TransitionToState(StateManager->GetFallingState());
        }
    }
}

void GlidingState::UpdateGlidingVelocity(float DeltaTime)
{
    if (!MovementComponent) return;

    FVector CurrentVelocity = MovementComponent->Velocity;
    FVector ForwardVector = OwnerCharacter->GetActorForwardVector();
    float GlidingMaxSpeed = OwnerCharacter->GlidingMaxSpeed;

    FVector DesiredHorizontalVelocity = ForwardVector * GlidingMaxSpeed;
    DesiredHorizontalVelocity.Z = 0;

    FVector NewHorizontalVelocity = FMath::VInterpTo(
        FVector(CurrentVelocity.X, CurrentVelocity.Y, 0),
        DesiredHorizontalVelocity,
        DeltaTime,
        OwnerCharacter->GlidingAcceleration
    );

    FVector NewVelocity = NewHorizontalVelocity +
                         FVector(0, 0, OwnerCharacter->GlidingVerticalVelocity);

    float HorizontalSpeed = FVector(NewVelocity.X, NewVelocity.Y, 0).Size();
    if (HorizontalSpeed > GlidingMaxSpeed)
    {
        NewVelocity.X *= GlidingMaxSpeed / HorizontalSpeed;
        NewVelocity.Y *= GlidingMaxSpeed / HorizontalSpeed;
    }

    MovementComponent->Velocity = NewVelocity;
}
The gliding state showcases:
Continuous energy consumption as part of a state machine (on tick)
State-Specific parameters such as the GlidingState movement values
Automatic transition when energy depleted during Update (on tick)
Integration with Unreal Engine
The state machine integrates with Unreal Engine's input system through the player character class:
void ABCPlayerCharacter::BindInputActions()
{
    if (!InputComponent) return;

    UEnhancedInputComponent* EnhancedInputComponent =
        Cast<UEnhancedInputComponent>(InputComponent);
    if (!EnhancedInputComponent) return;

    if (UInputAction* JumpAction = InputActions.FindRef("IA_Jump"))
    {
        EnhancedInputComponent->BindAction(
            JumpAction,
            ETriggerEvent::Started,
            this,
            &ABCPlayerCharacter::OnJumpPressed
        );
        EnhancedInputComponent->BindAction(
            JumpAction,
            ETriggerEvent::Completed,
            this,
            &ABCPlayerCharacter::OnJumpReleased
        );
    }

    if (UInputAction* ChargeJumpAction = InputActions.FindRef("IA_Charge_Glide"))
    {
        EnhancedInputComponent->BindAction(
            ChargeJumpAction,
            ETriggerEvent::Started,
            this,
            &ABCPlayerCharacter::OnChargeGlidePressed
        );
        EnhancedInputComponent->BindAction(
            ChargeJumpAction,
            ETriggerEvent::Completed,
            this,
            &ABCPlayerCharacter::OnChargeGlideReleased
        );
    }
}
Input handling methods then delegate to the state manager:
void ABCPlayerCharacter::OnJumpPressed()
{
    StateManager->HandleJumpStart();
}

void ABCPlayerCharacter::OnJumpReleased()
{
    StateManager->HandleJumpRelease();
}

void ABCPlayerCharacter::OnChargeGlidePressed()
{
    StateManager->HandleChargeGlideStart();
}

void ABCPlayerCharacter::OnChargeGlideReleased()
{
    StateManager->HandleChargeGlideRelease();
}
This delegation ensures that all state-specific logic remains encapsulated within the state machine.
Energy System Integration
One of the more complex aspects of the system is managing energy consumption across different states and abilities. The energy system needs to:
Track current and maximum energy levels
Handle temporary energy boosts
Manage energy consumption for different abilities
Restore energy under certain conditions
Here's how the energy system integrates with the state machine:
bool ABCPlayerCharacter::ConsumeEnergy(float energyCost)
{
    if (energyCurrent + energyTemporaryCount >= energyCost)
    {
        // First, consume from temporary energy
        float tempEnergyUsed = FMath::Min(energyTemporaryCount, energyCost);
        energyTemporaryCount -= tempEnergyUsed;

        // If there's remaining cost, consume from current energy
        float remainingCost = energyCost - tempEnergyUsed;
        if (remainingCost > 0)
        {
            energyCurrent = FMath::Clamp(energyCurrent - remainingCost,
                                       0.0f, energyMax);
        }

        return true;
    }
    return false;
}
This energy system is used by various states to gate their abilities:
bool FallingState::ConsumeEnergyForDoubleJump()
{
    return OwnerCharacter->ConsumeEnergy(OwnerCharacter->energyCostDoubleJump);
}

bool GlidingState::ConsumeGlidingEnergy()
{
    return OwnerCharacter->ConsumeEnergy(EnergyCostPerInterval);
}
Debugging and Development Tools
Developing a complex state machine requires robust debugging tools. I implemented several features to make development and testing easier:
State Logging
Each state transition and significant event is logged:
void CharacterStateManager::TransitionToState(CharacterState* NewState)
{
    FM_LOG(UBloomlightCitySettings::CVarStateMachineManagerLogging, LogBCCore, Log,
           TEXT("Transitioning from %s to %s"),
           *CurrentState->GetStateName(),
           *NewState->GetStateName());
    // ... transition logic
}
State Change Notifications
The system includes an observer pattern for debugging tools:
void ABCPlayerCharacter::NotifyStateChange(EFMJumpState NewState)
{
    for (auto& Observer : StateObservers) {
        if (Observer.GetObject()) {
            Observer->OnJumpStateChanged(NewState);
        }
    }
}
This allows debug visualizations to track state changes in real-time.
Challenges and Solutions
Challenge 1: State-Specific Movement Parameters
Different states needed different movement parameters (gravity scale, air control, etc.). The solution was to store original values and modify them per state:
void GlidingState::Enter()
{
    if (!MovementComponent) return;
    MovementComponent->SetMovementMode(MOVE_Falling);
    OriginalAirControl = MovementComponent->AirControl;
    OriginalGravityScale = MovementComponent->GravityScale;
    MovementComponent->GravityScale = 0.1f;
    MovementComponent->AirControl = 1.0f;
}

void GlidingState::Exit()
{
    if (!MovementComponent) return;
    if (OriginalAirControl > 0.0) {
        MovementComponent->AirControl = OriginalAirControl;
    }
    if (OriginalGravityScale > 0.0) {
        MovementComponent->GravityScale = OriginalGravityScale;
    }
}
Challenge 2: Movement Mode Synchronization
Unreal's character movement component has its own movement modes that needed to stay synchronized with our state machine:
void ABCPlayerCharacter::Tick(float DeltaTime)
{
    Super::Tick(DeltaTime);

    if (!StateManager) return;
    CharacterState* CurrentState = StateManager->GetCurrentState();
    CurrentState->Update(DeltaTime);

    if (GetCharacterMovement()->IsFalling() && !CurrentState->IsFallingState())
    {
        StateManager->HandleFall();
    }
    else if (GetCharacterMovement()->IsMovingOnGround() &&
             !CurrentState->IsGroundedState())
    {
        StateManager->HandleLand();
    }
    else if (GetCharacterMovement()->IsSwimming() &&
             !CurrentState->IsSwimmingState())
    {
        StateManager->HandleSwim();
    }
}
Challenge 3: Memory Management
Using raw pointers for state references could lead to memory leaks. The solution was to use TUniquePtr for state ownership while maintaining raw pointers for active state references:
class CharacterStateManager
{
private:
    TUniquePtr<GroundedState> GroundedStateInstance;
    TUniquePtr<FallingState> FallingStateInstance;
    // ... other states

    CharacterState* CurrentState; // Raw pointer for active state
};
Memory Ownership Structure
TUniquePtr GroundedStateInstance: This is the OWNER of the state
CharacterState* CurrentState: This is just a REFERENCE to whichever state is active
Why This Works Well
TUniquePtrautomatically cleans up the state objects when the manager is destroyed.The raw pointer (CurrentState) is safe because it only points to states we own via
TUniquePtr.State transitions are fast since we're just changing a pointer value.
Performance Considerations
While state machines add some overhead, several design choices keep performance impact minimal:
State Instance Management: Since this is a single-player game with one character controller, states are created once and reused. A more complex game might need a state factory pattern or state pooling system for multiple characters.
Minimal Allocations: No dynamic allocation during state transitions
Cached References: Movement component and character references stored at creation
Future Improvements
This implementation is intentionally a straightforward finite state machine, as that's what the current game needs. While statecharts offer powerful features, I chose to start with a simpler FSM implementation. Some potential future enhancements could include:
Hierarchical States: Implementing nested states for more complex behaviors
State History: Adding a state history stack for debugging
State Serialization: Saving and loading state machine configurations
Conclusion
Transitioning from data visualization to game development, I found that the finite state machine pattern translates well. The state machine pattern simplified my controller code and made the complexity manageable. While the implementation is more verbose than the javascript equivalent due to lack of a library, it provides the performance needed for a game while maintaining the clarity and maintainability that made statecharts so appealing to me in the first place.
Whether you're coming from a web development background like me or are a seasoned game developer, I hope this deep dive into state machine implementation proves useful in your own projects. The full source code is available on GitHub [link], where you can explore the implementation in detail.